HENRI MATISSE (1869-1954)
La Gerbe, 1953
Pronounced: Ma-tees
Art Style: Modern
Art Terms: curvilinear, primary colors, complementary colors
Activity: Collage
Medium: Paper
Materials: construction paper, scissors, glue sticks
(*this lesson has been adapted with permission for use at GKE from a lesson by Michelle Smit, Duniway Elementary)
Slideshare presentation found here
Meet the Artist: (We have a Matisse Smart About Art book in the closet that you may want to read to the class, if time allows). Other great information to prepare yourself - this brief article here; also this link here is neat, with photographs of him, etc.
Discussion Ideas: Choosing one of the slides to focus on, begin with the discussion questions - (1) What's going on in this picture? (2) What makes you say that? (3) What more can you find?
Other ideas you may want to bring out: Matisse painted for most of his career, but when he grew old he got sick and was confined to his bed for a period of time. This is when he began to make cut-out pictures. He called making these cut-outs "painting with scissors." Notice how Matisse hasn't used so many straight lines in his cut-outs. Another word for curved lines is curvilinear. Also his colors! Matisse felt like making art was an expression of joy and his colors in many of his paintings, and still, in his cut-outs - are bright and joyful. He used a lot of primary colors (red, blue, yellow - the colors that are the basis of the color wheel), and made those colors pop by putting the color's opposite (a complementary color) right next to a color (see the first slide, La Gerbe, notice the red/green; blue/orange...)
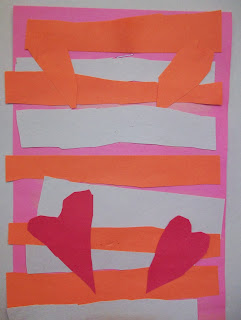
Activity: Have the students cut out a large rectangle or use a rectangular scrap in a contrasting color and have them glue it down to the middle of their paper. This will divide their background into three rectangular shapes creating a more interesting background. The colored stripe does not have to be exactly in the middle. The rectangle can be fat or thin. Their paper can be vertical or horizontal. They can use whatever color they want for the stripe. Then have the students use the scissors to cut out simple shapes with strong, bold colored construction paper. Cut out a variety of sizes from small to large. Suggest pasting down a small square or rectangle of another color behind their cutouts to create more depth. Remind them to use complimentary colors whenever possible. Use curvilinear shapes in addition to straight ones.
Once the students have enough shapes to fill up their 11x17-inch paper, have the students arrange their shapes on the paper BEFORE passing out the glue.
Have the students glue their shapes to their paper.
Tile Wall (Marker and Paper only) Variation: Have the kids look at their markers, and choose a color - then find its' complement (example: red/green; blue/orange; yellow/purple). Using these two colors, have the students create a few motifs with curvilinear shapes on scratch paper. (If they are stuck, flip back through the slideshow. Flowers, leaves, stars, birds are just a few ideas... you may want to draw some of these on the board.) Point out how those two colors make each other really pop, and suggest that they may want to use these two colors together in their final design. (But, whatever, I'd let them choose how they wanted to do it on their final paper as long as they kind of get the idea of complementary colors). On their final paper, have them draw their designs and color them in a way that makes them happy and "poppy."
Tile Wall (Marker and Paper only) Variation: Have the kids look at their markers, and choose a color - then find its' complement (example: red/green; blue/orange; yellow/purple). Using these two colors, have the students create a few motifs with curvilinear shapes on scratch paper. (If they are stuck, flip back through the slideshow. Flowers, leaves, stars, birds are just a few ideas... you may want to draw some of these on the board.) Point out how those two colors make each other really pop, and suggest that they may want to use these two colors together in their final design. (But, whatever, I'd let them choose how they wanted to do it on their final paper as long as they kind of get the idea of complementary colors). On their final paper, have them draw their designs and color them in a way that makes them happy and "poppy."
Student Work:


No comments:
Post a Comment